You’re about to launch your website, and you’re thinking about all the things that could go wrong. It’s enough to make anyone a little nervous. Guess what? these things can happen to the best of us. A pre-launch checklist of the tasks needed to ensure your new website is on the right track and ready can save a lot of time and money and boost your brand’s visibility.
Here are 5 main things you must take care of before pushing that publish button. Some of these are optional but can prove useful in the long run if you are just getting started.
Website security
Security should be a top priority at all times, but it’s especially important before launching a website. This is when you want to make sure that all of your most sensitive information is protected from hackers and any unauthorized access.
Set up a staging site
The first thing you should do is make sure that your staging site is set up properly. This is a “test” version of your site that you can use to test any new features or changes before you add them to your live site. It’s like a sandbox page where you can run tests without affecting the live version of your site. It ensures that if anything goes wrong, you’ll still be able to get back up and running as soon as possible.
Set up a backup
Any time you’re ready to launch a new website, it’s important to set up a backup plan. This is especially true if you’re working with a development team, as there will be times when things go wrong and you need to be able to fix them fast.
It’s also important to verify that your backups are working as expected. You want to make sure they’re being stored in a reliable location and that they’re being taken regularly.
Recommendation: iDrive is one of the most popular cloud data backup services for your database and servers.
Secure access
First off, make sure that all of your secure areas, such as the admin panel, payment systems, and any other areas where sensitive information is being stored have restricted access and search engines are not allowed to crawl them. This will help ensure that only authorized individuals can view or access these pages.
In addition to securing these pages, make sure to use strong passwords for each account on your site. Consider using two-factor authentication (2FA) whenever possible. 2FA adds an extra layer of security by requiring users to enter additional information when logging in or performing sensitive actions on a website.
Recommendation: Tools like GeeTest offer user-friendly CAPTCHA to protect from automated bot attacks and fraud.
Get an SSL certificate
SSL stands for Secure Sockets Layer, and it’s a protocol that encrypts communication between the browser and web server. It’s the “S” in HTTPS, and it’s used to secure connections between your website and a device.
An SSL certificate is a digital document that establishes the identity of a website owner, as well as identifies them as someone who has been authorized to deliver sensitive information via their website. It’s important to get an SSL certificate for your website. This will tell search engines that they can trust your site because it’s secure!
Recommendation: Companies like Let’s Encrypt offer SSL certificates.
Enable HTTPS
Enabling HTTPS on your website is a crucial step toward making your website secure.
HTTPS is a layer of security on top of HTTP that encrypts the connection between a browser and your website. It ensures that any data shared with your visitors remain private and secure from hackers or unauthorized access.
Recommendation: CAPTCHA providers like GeeTest ensures both ease of use and security in every step of your online customer journey. It makes human-bot verification a smooth and reliable experience for your customers and yourself.
Legal compliance
Legal compliance is an essential part of any website. Your site needs to be in line with legal requirements to run smoothly, and it’s not just about protecting you from liability—it’s also about protecting your customers.
Before you launch your website, you’ll want to make sure that you’re in compliance with all relevant laws and regulations. Check for any federal, state, or local laws that apply to your business. This can include things like copyrights and trademarks laws, employment laws, and tax laws.
If possible, make sure you’re in compliance with the Payment Card Industry Data Security Standard (PCI DSS). It’s a set of standards that helps protect credit card information and other sensitive data during transmission or storage. If you’re not compliant with PCI DSS, you could be held liable for any data breaches that occur on your website—even if they weren’t caused by you!
If your website is going to be used by customers who are disabled, it must be ADA compliant. This means that the site must comply with the Americans With Disabilities Act and other relevant laws that protect people with disabilities.
We will take a look at accessibility best practices in detail later in the article.
Here are a few quick things that you can do to make your website legally compliant:
Add terms and conditions
A terms and conditions page is a legal page that provides the general terms of use for your website. It’s important to add this page to your website before you launch it because it helps inform visitors of what they can expect from your site, what they can’t expect, and how they should use it.
A good T&C page will also help protect you against liability if someone sues you because they feel that you have broken the law or misrepresented yourself in some way.
Add a privacy policy
A privacy policy is a legal document that explains the ways in which your website collects and uses personal information. It also provides information about how you handle data breaches and other privacy issues.
Adding a privacy policy to your site is one of the most important things you can do to ensure that you’re in compliance with the law, but it’s also one of the easiest ways to show your visitors that you care about their privacy and security by letting them know exactly what’s happening with their data.
Recommendation: CookieYes’ free privacy policy generator lets you create a privacy policy tailored for your website. All you need to do is submit your answers to the questionnaire and you will receive a customized policy that you can copy as text or HTML.
Add a cookie policy
Your website most likely uses cookies set by software, tools, CMS, or plugins that you might have installed on the website.
A cookie policy is a requirement for any website that collects personal information. This is because cookies are used by many websites to track user behavior, and in some cases, they can be used to store sensitive information.
Cookies can actually be good for marketers, but they could also be a bane for modern internet users who want to keep their privacy intact. That is why we recommend that if your website will use a lot of cookies, you add an entire page dedicated solely to explaining how it uses them and what kind of data it collects from users. The page should also explain how users can manage cookies or remove or block them from their devices.
Recommendation: CookieYes has a free cookie policy generator to help you scan your website for cookies and create a customized cookie policy. This page will list all the identified cookies and their details and also how users can manage them.
Implement cookie consent notice
If your website will cater to EU visitors or any country where cookie laws apply, and you collect their data via cookies to provide goods and services to them, you need users’ consent to store cookies.
Laws like GDPR make it mandatory for subjected websites to get cookie consent before storing tracking cookies on user devices. Cookies can be set by your own website, by the CMS, or by any third-party service you may be using on your site.
The easiest way to implement this is by showing a cookie banner on your website which will ask users for permission to store their information on your site. This way, if they don’t want their information stored on the site via cookies, they can choose not to allow it.
Read more about the best practices to use a cookie banner here.
Recommendation: CookieYes is one of the best ways to implement cookie consent and manage cookie compliance. It takes just a few simple steps to set up your cookie banner and policy pages to start complying with cookie laws.
Accessibility
A website should be accessible to everyone, regardless of their abilities or disabilities, or other barriers to using the internet. What does that mean for you? Well, it means that your site has to be easy to navigate and use for users with physical or cognitive disabilities.
The Web Content Accessibility Guidelines (WCAG) 2.0 are the standards for accessibility on the web. If you want to make sure that your site is accessible, you’ll need to follow these standards.
The WCAG is designed around four principles, known as POUR principles. POUR means Perceivable, Operable, Understandable, and Robust. Let’s look at what each of them means.
- Perceivable: it means that users can access and perceive the content and functionality of a website. It’s about making sure that your site is usable by as many users as possible, including those with disabilities or impairments.
E.g. if you’re using images or videos on your site, make sure they’re captioned or described so that users who are visually impaired can understand what is there on the screen.
- Operable: it means that users can take actions on the website efficiently and correctly and is operable by everyone regardless of any disability they may have.
E.g. Your site should be navigable with a keyboard alone—no mouse required! This means that all of your links must be labeled with an accessible name.
- Understandable: it means the website provides information to users in ways they understand. Create content that will be understood by everyone who reads it—no matter their education level, language proficiency level, or other factors which may affect comprehension abilities.
E.g. if your website uses a lot of legal jargon, explain what they are and provide definitions wherever necessary. Or, avoiding abbreviations unless they’re universally understood.
- Robust: it means making sure that your website is available to users in a wide variety of situations. It should be compatible with commonly used technologies. Users shouldn’t have to rely on external third-party applications to access your website.
E.g. Your website should be designed to be accessible from different devices, operating systems, or browsers.
Always remember that search engines favor websites with good accessibility. Google Design has published information and case studies on how it researches and designs with global accessibility in mind.
How can you apply all these principles? let’s look at a few elements where you can incorporate these principles.
Check site speed
Website loading speed is an important part of your website’s user experience. It’s not just about being able to access your content—it’s about how quickly that content appears on the screen, how quickly it loads, and how easy it is to navigate around the site.
If your website takes too long to load, visitors will likely bounce before they even get a chance to read anything.
One way to improve your site’s loading speed is with a Content Delivery Network (CDN), which stores copies of your content across servers around the world so that users can access it more quickly than if they were relying on one server. This significantly improves the website’s speed and performance.
Recommendation: You can use tools like Google’s Page Speed Insights to test your website’s loading speed and how much work needs to be done to improve it. It will also show you recommendations for how to fix them.
Check responsiveness
Many users are viewing websites from mobile devices these days, so it’s important to make sure your site looks good on those platforms.
Responsiveness is the ability of your site to adapt to different screen sizes and orientations so that it looks good on any device or browser that a user is using to access your website.
Recommendation: You can use free tools like Responsive Test Tool or Responsive Design Checker or even Chrome’s developer console to check your website’s responsiveness.
Check language
When it comes to writing your website, you must keep it simple and easy to understand. This is something we all know but still, so many people make the mistake of using overly complicated language that can be difficult for users to understand, which will increase your site’s bounce rate. Your website’s language should be:
- simple and easy-to-read.
- error-free and understandable by your users. When writing for the web, keep in mind that people read on a screen, so make sure that you use short sentences with familiar words.
- avoiding jargon, unless you’re sure your audience will understand them.
Recommendation: You can run your page texts through a grammar and spelling checker like Grammarly or Microsoft Word’s built-in spelling and grammar checker. This will also help you identify any incorrect or unnecessary words so that you can remove them from your text.
Check pages
If you have not already done so, check if:
- all the pages of your website are laid out in a logical order.
- there is a clear call to action on all important pages
- content on the pages is easy to navigate throughout the website.
- there is consistency in font style, size, and color throughout all website pages.
- you are using consistent color schemes in your pages consistent with your site’s branding.
Testing
Test page content
We’ve already discussed this, but before the new website goes live, you’ll want to make sure your website content is error-free and search-friendly. This can be a tedious step, but it’s important to ensure.
- Proofread content thoroughly to find erorrs
- Optimize your page content with keywords relevant to your brand and industry. This process involves checking through each page on your site and adding additional keywords where necessary so that search engines can easily find and index the pages.
- Check for any missing pieces of content on any of your pages. Fill them in before launching the site.
- Last but not least, ensure that you’ve replaced all placeholder texts with appropriate content.
Recommendation: check-plagiarism can help find plagiarised content (if any) and Narrato is a top content workflow tool that can optimize content using AI for readability, grammar, and structuring.
Test images and other media
This may seem like a no-brainer, but you must ensure that all images, videos, and other media are working properly and that they are not missing. You don’t want your website to look incomplete and unprofessional. That is why it’s crucial to test images, videos, and other media before you launch.
Here are some tips for making sure everything looks great:
- All placeholder images must be replaced with appropriate images. You don’t want your website to look incomplete and unprofessional if you forget something that is crucial.
- Check if all images have alt texts. Alt texts are text descriptions of an image as they allow users to understand what they’re looking at in case their browser is unable to load them.
- Images must be compressed without losing quality. This will help them load faster & save bandwidth.
- Similarly, make sure you are using video formats that are compatible with commonly used technologies and do not slow down your loading speed
Add Favicon
If you have a business, you need a favicon.
Favicon is a small pixel image that appears on the tab of your browser when you open your website. It’s also called a browser icon or shortcut icon. It will be the first thing people see when they visit your website, so make sure it looks good and gives off the right vibe for your brand.
Test HTML/CSS
Next, your website’s HTML and CSS code should be well organised, use valid tags, and be free of errors.
The more organized your code is, the easier it will be for search engines to find and index your pages. This means that more people will find your website through search engines.
Recommendation: You can use a tool like W3C Markup Validation Service to check your codes.
Test for broken links
Broken links are a common problem. that is because they’re so easy to overlook, and sometimes the culprit is something as simple as a typo or an outdated link. If you have a lot of broken links on your website, it can negatively impact your SEO and user experience.
Before you launch your site into the world, make sure that all of your links, both internal and external, including the buttons work correctly and lead where they’re supposed to go.
Recommendation: You can crawl your website using Google Search Console and find URL errors where you will see all the broken links on your website. Or you can use a simple tool called W3C link checker to identify the broken links.
Test forms
Forms are a great way to connect with users and can also help you collect data, which can be helpful for various purposes. You most likely have at least one on your site.
Make sure the forms are working and that they have options to ask for user consent before collecting their information. The form should collect the only necessary information. The last thing you want is a form that collects too much information or doesn’t collect enough information, so make sure you test those out before you launch.
Integrations
There are a lot of third-party services that you may want to use on your website, such as CRM, tags, social media embeds like Facebook or Twitter, email marketing platforms, such as Sendinblue or Mailchimp, and analytics tools like Google Analytics.
Your integration might not be technically “complete” at this point. But it should be configured correctly so that when you launch your site, all of these things work as they should.
Analytics integration
Analytics integration is an important part of pre-launch website preparation. You want to make sure you’re tracking everything and using it to your advantage—before the site goes live. So when the site goes live, you can see how many people are visiting it, what they’re doing when they’re there, and how you can improve over time.
Recommendation: There are a ton of analytics tools out there, including Google Analytics and Hotjar.
CRM
If your website is going to offer goods or services, make sure you use a CRM system.
The Customer Relationship Management (CRM) system is software that helps businesses manage their customer relationships. It can be tough to manage if you don’t have the right tools in place, but with the right software, it’s easy.
A good CRM system will help you keep track of your customers, but also make sure all their data ends up where it needs to go when you want it there. It’s important to choose a CRM that has the features you need, but it’s also important to find one that works with all the other tools you’re using on your website.
Tags
A tag manager is an essential tool that allows you to manage your site’s tracking and analytics. You can set up campaigns and track them using tag managers.
Running a campaign is a great way to track the performance of your website and make sure it’s performing well. You can run campaigns on specific pages, certain tags, or even across all pages. For example, if you have a tag for retargeting users who visited your product page but did not complete their purchase, you could set up a tag running campaign that fires when those users visit any page on your site.
It’s critical to make sure your tag manager is set up correctly before you go live.
Recommendation: Google Tag Manager is the best tag management tool that can manage your site’s tags.
Support
It’s important to connect your website with your customer service platform so that when users have a question or issue, they’ll be directed to the right place. This can be done using a simple contact form or by integrating with live chat software so that they can chat with a representative if they need help.
The most important thing is to make sure that your website has an easy way for users to contact you—whether it’s through email, phone, social media, or even chat. At the same time, it should be convenient and manageable for you.
Make sure your contact information is correct and updated.
Recommendation: Zendesk is an efficient help desk software that helps websites streamline customer support.
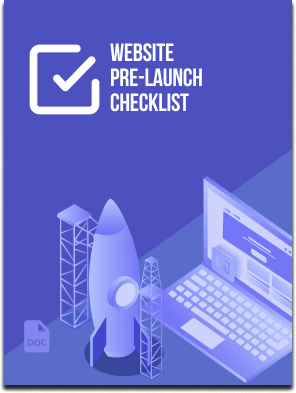
Free website pre-launch checklist [doc]
Avoid the biggest, common pitfalls in your website launch with our free pre-launch checklist. Click on the image below to download a free Google doc of the checklist. Select “Make a copy” to get your copy.

So there you have it: the ultimate website pre-launch checklist. We hope this checklist helps you launch your website with confidence.
As you know, there’s no one-size-fits-all approach to launching a website. If you have a specific strategy in mind, feel free to skip over things that aren’t relevant to you. If we are missing something, please let us know.
It’s also important to keep in mind that while it’s unlikely that everything will go wrong during your launch, it’s always good practice to prepare for the worst and hope for the best!
Free website pre-launch checklist
Want to launch your website in style? Download our free checklist and make sure you’ve got everything you need.
Download for Free
![The Ultimate Website Pre-launch Checklist [Free Download]](https://www.cookielawinfo.com/wp-content/uploads/2022/07/Website-pre-launch-checklist-hero-1.png)


